
You can create item banks in New Quizzes. Item banks can be used to store questions for use in other quizzes. You can use your item banks in any course where you have permission to create and edit a quiz using New Quizzes.
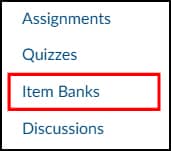
- In Course Navigation, click the Item Banks link.
- Click the Add Bank button.

- In the Bank Name field, enter the name of the item bank. You can share the new item bank to the current course by clicking the Share checkbox. To save your bank, click the Create Bank button.

Once you create content in a quiz, you can add it to an item bank for use in other quizzes.
After a question has been added to an item bank, all question properties other than point value and certain options must be edited in the item bank. You should make sure your question is complete before adding it to an item bank.
Note: When you add stimulus content to an item bank, questions attached to the stimulus content are not automatically added and must be added to the item bank manually. Likewise, when you add stimulus content to a quiz from an item bank, attached questions are not automatically added.
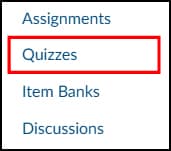
- In Course Navigation, click the Quizzes link.
- To add content to an item bank, find the quiz you want to open and select the Build option.

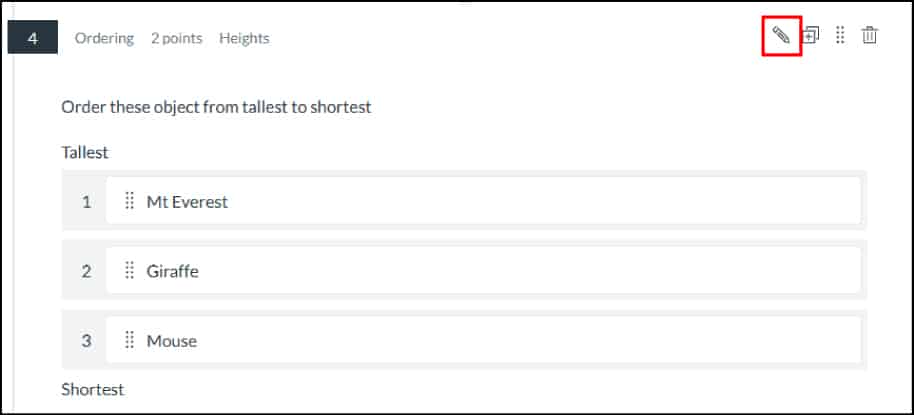
- Locate the question you would like to add to the item bank. Click the Edit icon.
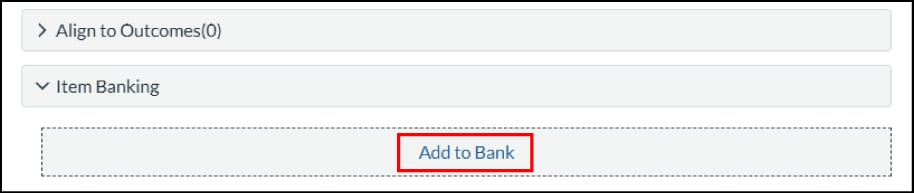
- Click the Item Banking button.

- Click the Add to Bank link.
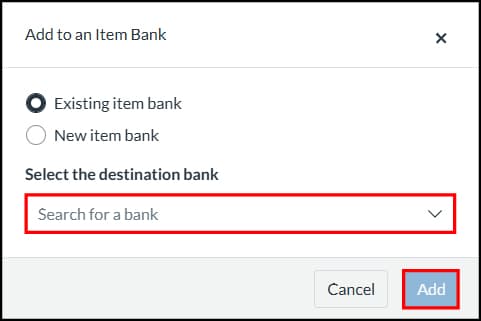
Add to Existing Bank
- To add the item to an existing item bank, click the Existing item bank option. Then select the item bank you want to use in the Select the destination bank drop-down menu.
- To add the item to the bank, click the Add button.
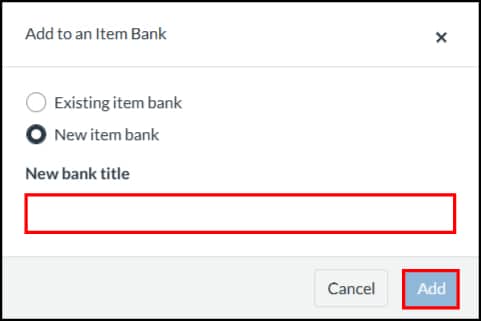
Add to New Bank
- To create a new bank for the item, click the New item bank option. Then enter the name for the new bank in the New Bank Title field.
- To add the item to the new bank, click the Add button.
You can add individual questions from an item bank to a quiz in New Quizzes.
You can add an question from an item bank using the Item Banks button on the Build page. You can also access your item banks when adding content to a quiz.
- In Course Navigation, click the Quizzes link.
- To add an item from an item bank, find the quiz you want to open and select the Build option.
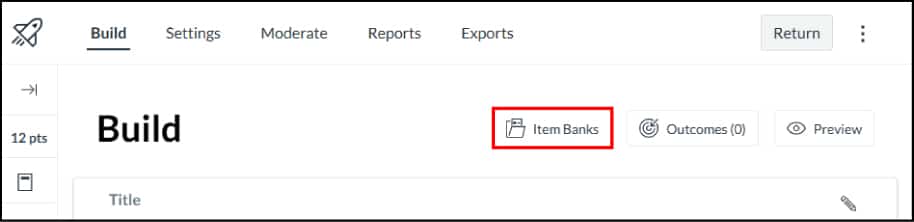
- Click the Item Banks button.
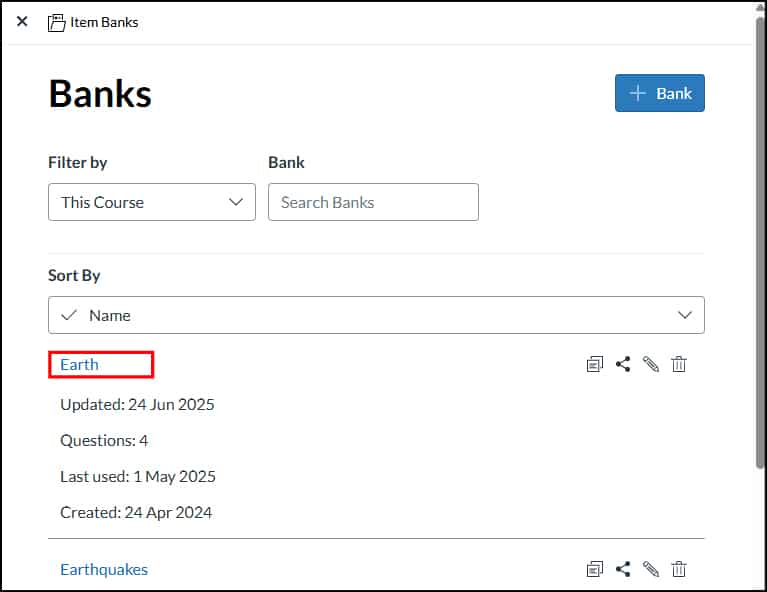
- Click the name of an item bank.
- To add an item to a quiz, click the Add button next to that item. The item will display in the quiz.

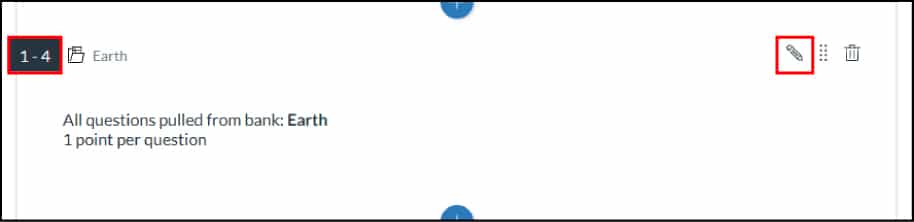
You can add multiple items to a quiz from an item bank in New Quizzes. These questions display in random order. Depending on the number of items you include from your item bank, students may view different questions when taking their quiz.
- In Course Navigation, click the Quizzes link.
- To add all items or a random set from an item bank, find the quiz you want to open and select the Build option.
- Click the Item Banks button.
- Click the name of an item bank.
- Click the Add All/Random button.

- By default, the quiz includes all items from the item bank and will award one point per question. To edit these settings, click the Edit icon.
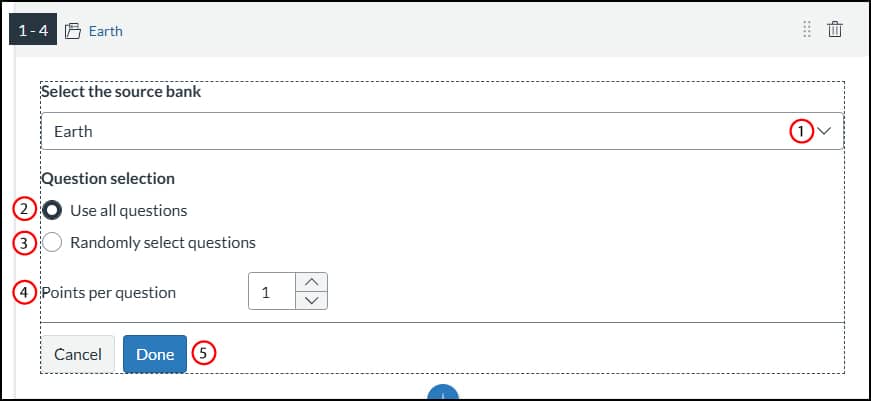
- To change the item bank for the items, click the Select the destination bank menu [1].
To use all items from the item bank, select the Use all questions option [2]. To randomly select a specific number of items, click the Randomly select questions option [3] and enter the number of items to use in the Number of questions field.
To adjust the amount of points awarded per question, enter the number in the Points per question field [4]. To save your settings, click the Done button [5].
You can share an item bank with another user in New Quizzes or to another Canvas course. Item banks can only be shared with users with a teacher, TA, or admin role.
You can choose to share an item bank with view or edit access. Sharing an item bank with view access only allows the user you share with to view the item bank. Sharing an item bank with edit access gives users full access to the item bank, including adding items to the bank, sharing or removing users from the bank, and deleting the bank.
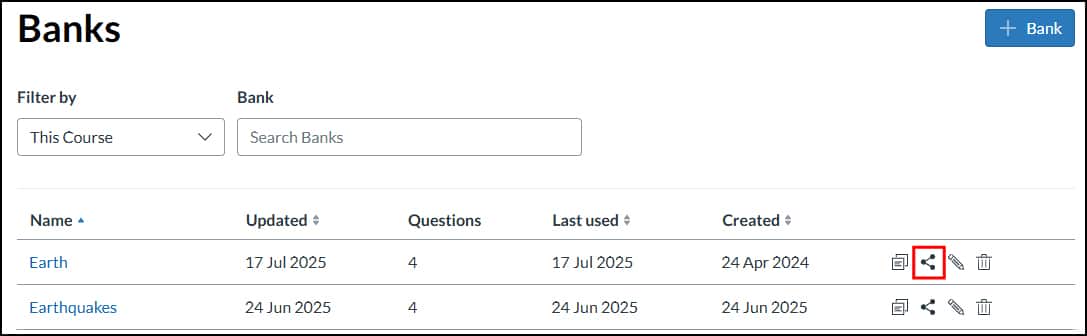
- In Course Navigation, click the Item Banks link.
- Locate the item bank you want to share, then click the Share icon.
Share with a User
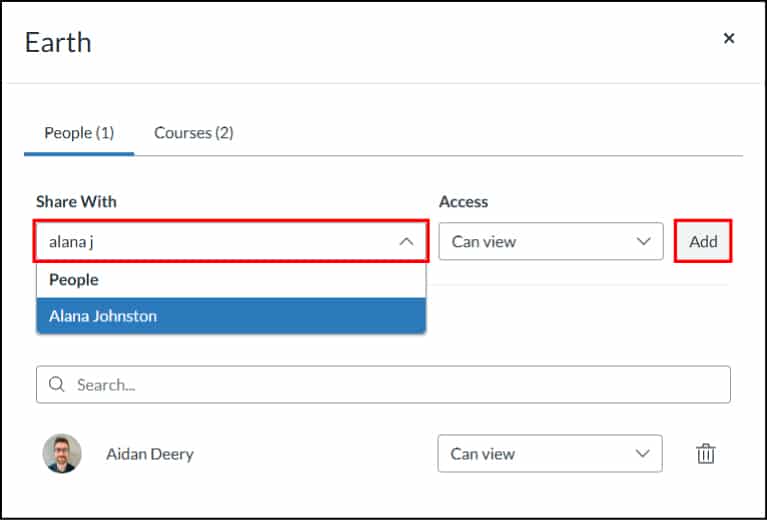
- Enter the name of the user you want to share the item bank with in the Share With field. Then click the name of the user. You can add multiple users in the Share With field.
To set access rights for the item bank, click the Access drop-down menu. You can share the item bank with view access, which only allows the user you share with to view the item bank, or edit access, which allows the user you share with to view and edit the item bank.
To share the item bank with the selected course, click the Add button.
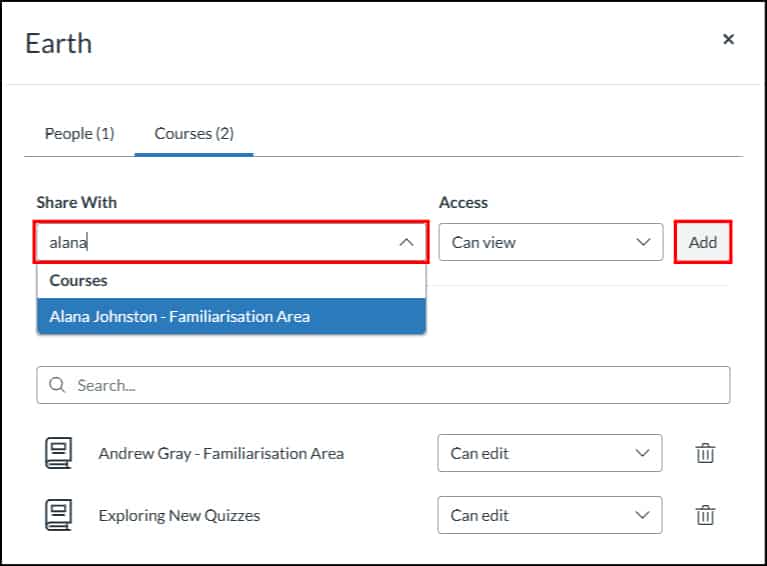
Share with a Course
Select the courses tab at the top of the window. Enter the name of the course you want to share the item bank with in the Share With field. Then click the name of the course. You can add multiple courses in the Share With field.
To set access rights for the item bank, click the Access drop-down menu. You can share the item bank with view access, which only allows the course you share with to view the item bank, or edit access, which allows the course you share with to view and edit the item bank.
To share the item bank with the selected course, click the Add button.
You can move a Classic Quizzes question bank to a New Quizzes item bank. Follow these general steps:
Export Classic Quiz
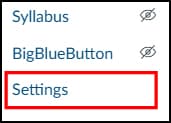
- In Course Navigation, click the Settings link.
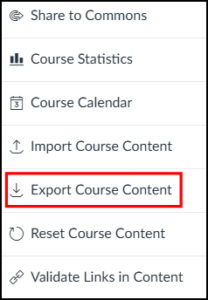
- In the sidebar, click the Export Course Content button.
- In the Export Type section, click the Quiz radio button.Click the checkboxes of the quiz or quizzes you want to export.Click the Create Export button.
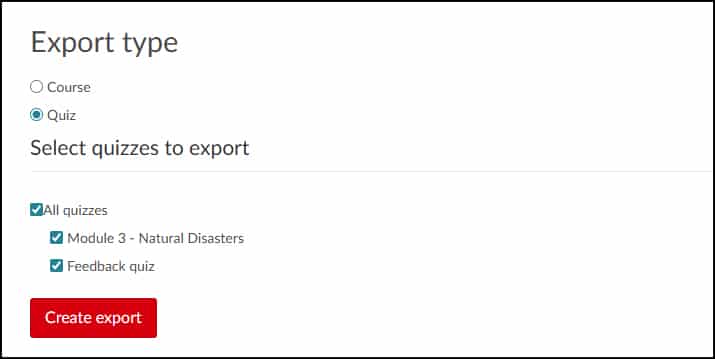
Note: When you create an export, Canvas creates an export archive where you can download previously exported files.
Create a New Quiz Item Bank
- In Course Navigation, click the Item Banks link.
- Click the Add Bank button.
- In the Bank Name field, enter the name of the item bank. You can share the new item bank to the current course by clicking the Share checkbox. To save your bank, click the Create Bank button.
Import Content
- Within the new Item Bank, click the Options icon then select the Import Content option.
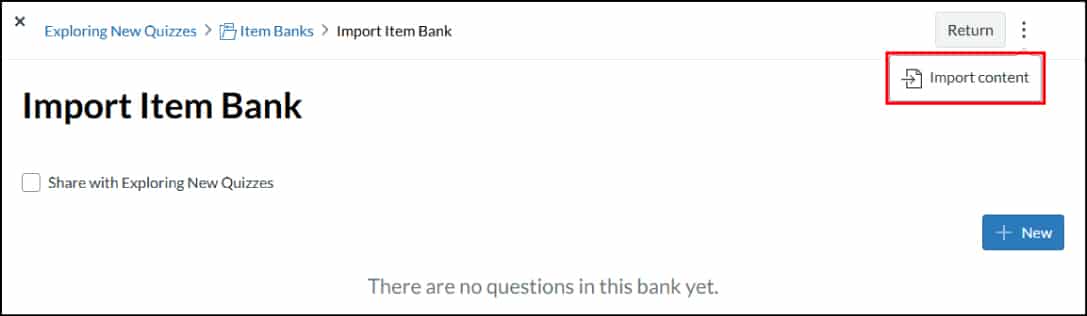
Note: To select the Import Content option, the item bank must not contain any questions yet.
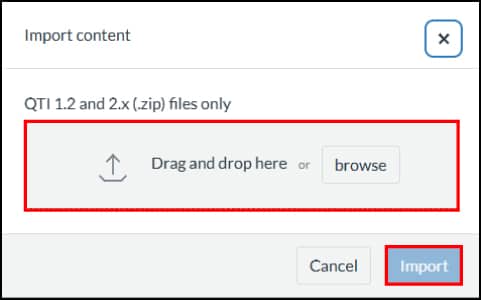
- Drag and drop the exported ZIP file or select the file by clicking the Browse button. To start the import, click the Import button.
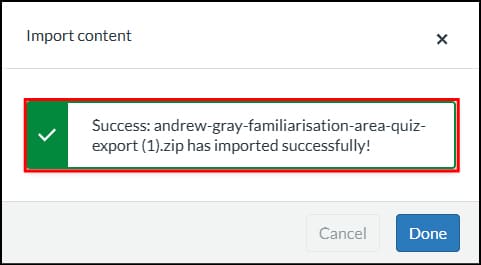
- When the import is complete, a success message displays. You can now view the imported questions in your item bank.